
 Paloma

Table of contents
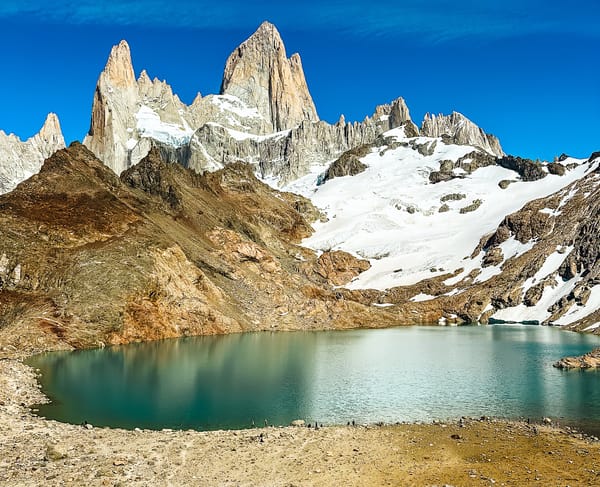
You have probably seen this famous skyline in pictures or in the Patagonia brand logo.
People come from all over the world only to see Mount Fitz Roy in Patagonia with their own eyes, and honestly, who could blame them? This is one of the most EPIC hikes I have ever done, and if you're visiting Patagonia, you should definitely do it!
This guide covers everything you need to know about hiking to Mount Fitz Roy, from when to go, what to bring, and how to get there, to a detailed hike breakdown.
Let's dive in!

The hike at a glance
Hard/Extra Hard- Distance
- 14 mi (22.5 km), out-and-back
- Time needed
- 8 to 10 hours total
- Elevation
- 3458 ft (1,054 m) up & down
- Starting point
- Sendero Laguna de los Tres, in El Chalten
- Cost
- about 42 USD, cheaper if bought as a multi-day hiking pass
- Crowds
- Medium to High
- Best months to go
- December to March
- When to go
- Early morning, on a clear day
- Sun exposure
- Medium to High
Trail overview
Hiking Map
Difficulty
3/4 of the hike is easy to moderate. However, the last part is very hard, as most of the elevation gain happens just before the lake over a 1km distance.
How to get to the Laguna de los Tres Trailhead
The trail to Laguna de los Tres starts right at the northern end of El Chaltén, so if you're staying in town, you can reach it on foot (See Sendero Laguna de los Tres here).

Practical planning
When to go to Laguna de los Tres
From December to March, summer is the best time to hike to Laguna de los Tres. You can also hike to Laguna de los Tres in the shoulder season months of April and October. Outside these months, the trail might be closed due to extreme winter weather.
Fees to Hike to Laguna de los Tres
In 2026, the daily hiking fee in El Chaltén is 60,000 Argentine pesos (around USD 40).
However, if you plan to hike for more than one day, you should buy a multi-day pass to save money.
You can buy your ticket online or at the beginning of the trail. I recommend buying multi-day hiking passes directly in El Chaltén because they can explain the offers much better in person than online.

What to bring
- Sturdy pair of hiking shoes
- Water - you can refill water on the streams you come by. You can bring something to filter the water if you prefer to be extra safe
- Food and snacks - there are no services whatsoever on this hike
- Sunscreen, sunglasses & hat – on sunny days, the UV index can be pretty high, and the snow's reflections can be harsh
- Camera
- Layers – the weather can change quickly, and even on sunny days, it can get cold at the top
- Hiking poles – optional but handy, especially for the last mile
Other things to consider
This is the most famous hike in El Chaltén, so if you only have one full day here, this is the hike you will want to do.
Try to start the hike early to avoid the crowds and the horseflies, which can be pretty annoying.
This is a well-signaled trail, and each kilometer is marked with a sign. That being said, you will most likely lose service once you're in the mountains. It's a good idea to download the trail map on your phone in advance. This could save you some unnecessary detours that could add steps to an already challenging hike.
The Trail in Pictures
1. El Chaltén to Fitz Roy Lookout

The beginning of the trail is uphill but nothing too crazy. Along this section, you will find several opportunities to snap a photo of the stunning Las Vueltas River.
Only 4km into the hike, the Fitz Roy Lookout offers the first view over the magnificent mountain range. I wouldn't spend too long there unless this is the end of your hike. You will have more and better opportunities to photograph Fitz Roy.
2. Fitz Roy Lookout to the Hidden Waterfall
Not far after the Fitz Roy Lookout, you will find the Hidden Waterfall. It is located at kilometer 5 of the trail.
Park rangers have removed the kilometer 5 marker to limit the number of people going to the waterfall. This is because the stones near the water are slippery, and the current can pull you away. Be cautious and visit the waterfall at your own risk.
You can find the trail leading to it on AllTrails or try to find it on your own. It is located on your right between kilometers 4 and 6 of the trail toward Fitz Roy. Be aware that this will be a difficult task if you don't have AllTrails.
3. Hidden Waterfall to Laguna de los Tres
After the detour to the hidden waterfall, return to the main trail. You will reach the Poincenot campsite. The trail's last mile is the hardest part, so remember to keep it slow and steady! Although they aren't required, I recommend bringing hiking poles.

However, if you've been to Chilean Patagonia before and this is one of your last trails in the area, it shouldn't be too difficult.

4. Laguna de Los Tres to Lookout Laguna Sucia

After resting and taking pictures at the famous Laguna de los Tres, I highly recommend continuing left and climbing the small hill. This leads to the impressive lookout, which gives you a comprehensive view of Fitz Roy, Laguna Sucia, and Laguna de los Tres from above.
Bonus: Laguna Capri

If you get FOMO from not seeing as much as you can, like me, you will probably add Laguna Capri to your hike. You can do this either on the way to Fitz Roy, right before the hidden waterfall, or on your way back to town. Either way, the detour will only add ... to the hike.
Alternative Route:
You can also do this one-way hike, starting at Piedras Blancas and finishing at El Chaltén. If you decide to do it this way, you will have to arrange transportation (taxi or shuttle) from El Chaltén to the starting point at Piedras Blancas.
I haven't personally tried this route and have heard mixed opinions about it.